Tuesday, August 7, 2012

Zucchini Bread

We have had a lot of Zucchini this summer, which is great roasted, sautéed or in a stir fry...but a few times we didn't pick them before they got HUGE.


Zucchinis do not taste very good when they get this big...so you have to make ZUCCHINI BREAD!

I adapted this recipe from Allrecipes.com: Mom's Zucchini Bread.  My substitutions and changes are in  italics.
Ingredients
  • 3 cups Flour (I used whole wheat flour or 1/2 whole wheat, 1/2 regular)
  • 1 teaspoon salt
  • 1 teaspoon baking soda
  • 1 teaspoon baking powder
  • 3 teaspoons ground cinnamon
  • 3 eggs
  • 1 cup vegetable oil (I used Applesauce instead...did you know you can substitute applesauce for oil in baking! I buy the unsweetened kind)
  • 2 1/4 cups white sugar (I used 1 cup white sugar, 1 cup brown)
  • 3 teaspoons vanilla extract
  • 2 cups grated zucchini (I used a LOT more than this...but the second batch I think I used too much and it was really mushy. I think you can easily do 3-4 cups and be fine!)
  • 1 cup chopped walnuts (Didn't add this)
  • Optional: Chocolate Chips :)

  • Directions

  1. Grease and flour two 8 x 4 inch pans. Preheat oven to 325 degrees F 
  2. Sift flour, salt, baking powder, soda, and cinnamon together in a bowl.
  3. Beat eggs, oil, vanilla, and sugar together in a large bowl. 
  4. Add sifted ingredients to the creamed mixture, and beat well. 
  5. Stir in zucchini and nuts until well combined. Pour batter into prepared pans.
  6. Bake for 40 to 60 minutes, or until tester inserted in the center comes out clean. Cool in pan on rack for 20 minutes. 
  7. Remove bread from pan, and completely cool.
Notes


  • The second time I made this, I made 1 loaf of bread about a dozen muffins, they were amazing! You will have to adjust the cook time, I think they took about 20-25 minutes.
  • I also added chocolate chips to one of the loaves and that was pretty amazing!
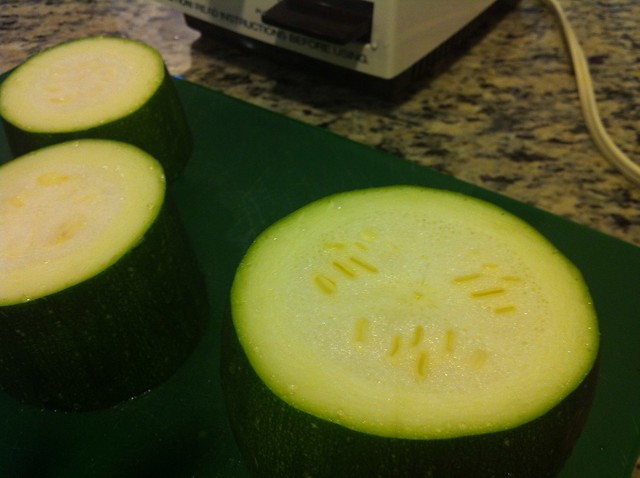
I cut the Zucs into chunks...
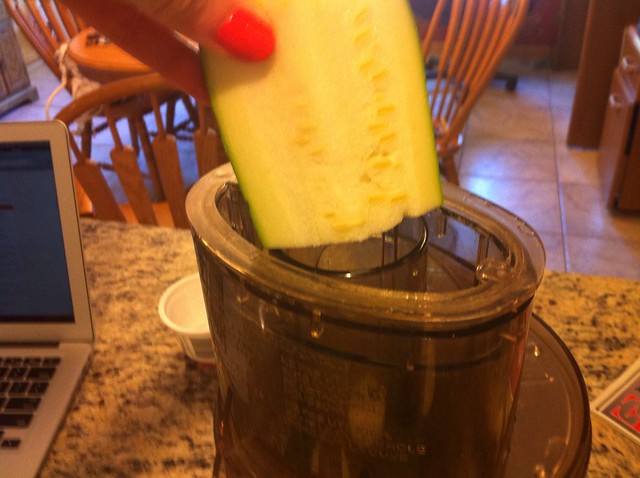
And used the grating attachment on my food processor...clearly this piece is not going to fit!
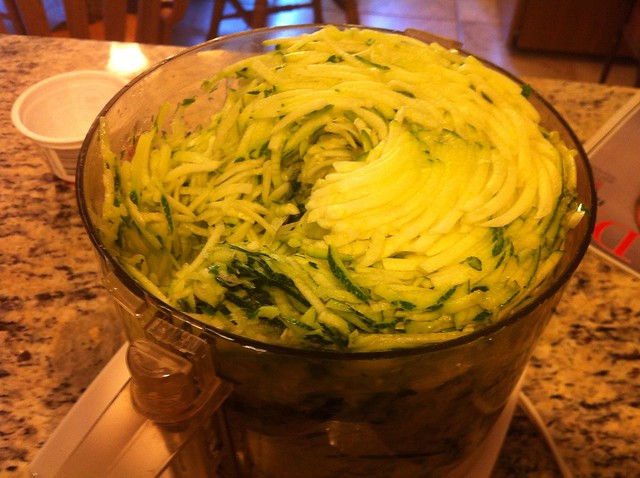
You can use too much zucchini. I used 5-6 cups the second time I made it and it was way too moist. I should have made two batches :) 3-4 cups is perfect. 

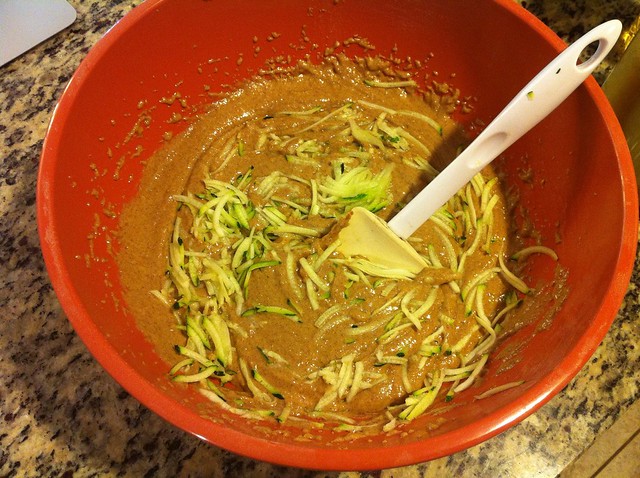
Stir in the zucchini goodness...

Of course, I forgot to take a picture of the bread when it came out of the oven! The muffins were gone before I got home from work the next day and the bread went just as quickly!


Saturday, August 4, 2012

Homemade Flour Tortillas -YUM

So I get lazy with shopping sometimes and Tacos are a go-to meal as they are so quick, healthy and delicious!
The problems becomes tortillas are not always on hand because they go bad when they are in the freezer for too long. So one day I searched the internet and came across this FANTASTIC FLOUR TORTILLA recipe. Supposedly better than the Mexican Tortillas in Texas. And though I have never had an authentic Texan tortilla I must say I could eat these all day everyday. So could Zorro my cat who decided it would be fun to much down a few as they were cooling. He has the same taste as me - warm tortillas.

A few hints and tricks as you make the recipe below:
They are freezable. I let them cool completely and then place a paper towel between layers of 4.
I double the recipe so I have more on hand and don't have to make them as often.
These are also great for wrap sandwiches.


THE RECIPE:

  • 2 cups of flour (1c. wheat, 1c. AP)
  • 1 1/2 tsp. baking powder
  • 1 tsp. salt
  • 2 tsp. vegetable oil
  • 3/4 cup warm milk
  1. Combine the flour, baking powder and salt in a bowl. In another bowl combine the warm mil and oil.
  2. Add the milk/oil mixture to the flour mixture, one tablespoon at a time and mix the dough with a fork. Once the water is mixed in, add another tablespoon of water and repeat the process until all the water is mixed into the dough.
  3. The dough will be sticky.
  4. Kneading The Dough
  5. Lightly flour a wooden cutting board and knead the dough.
  6. Kneading is done by pushing the dough with the heals and palms
  7. of both hands down onto the board. Fold the dough back onto itself, give a quarter turn and push again with the palms and heels of your hands. Just repeat the process of pressing, folding and turning for about 4 or 5 minutes. Add a dusting of flour when the dough gets sticky.
  8. Place the dough back into the bowl and cover it with a damp towel or damp paper towel. Let the dough rest for 20 minutes.
  9. Divide the dough into golf-ball-size balls by pinching off the dough with your thumb and fore finger. Form each ball into a nice ball shape.
  10. Place the balls on a flat dish making sure they don't touch each other and cover with the damp cloth.
  11. Place the balls on a flat dish making sure they don't touch each other and cover with the damp cloth.
  12. Preheat a skillet or cast iron pan on medium high heat. You really can't beat cast iron pans for even heat distribution and their ability to withstand high heat without warping.
  13. Lightly dust your wooden cutting board with flour. Take one of the balls of dough and flatten it out on the cutting board to a 4 inch circle. Rub flour on your rolling pin and begin to roll out the dough starting from the center out. Roll the tortilla until it is 6 or 7 inches in diameter and about 1/8 inch thick. Roll as thin as possible as when it starts to cook it thickens up a bit.
  14. Back to the flour tortilla recipe...
  15. Once you have rolled out the tortilla, place it on a preheated skillet. You don't need to add any oil or butter. Cook the tortilla for about 30 seconds. You will notice brown spots all over your tortilla. Flip it over and cook an additional 30 seconds. I try to have about 3 rolled out prior to starting to cook because rolling takes me longer than cooking. 

The Finished Product